Key Takeaways:
- Read through the manual for important information before setting up
- Inflate the hot tub and the cover using the “Massage System” button on the pump, and then connect the pump and attach the ChemConnect® dispenser
- Using a garden hose, fill up the hot tub to the indicated level and then wait 24 hours for the water to get to the set temperature
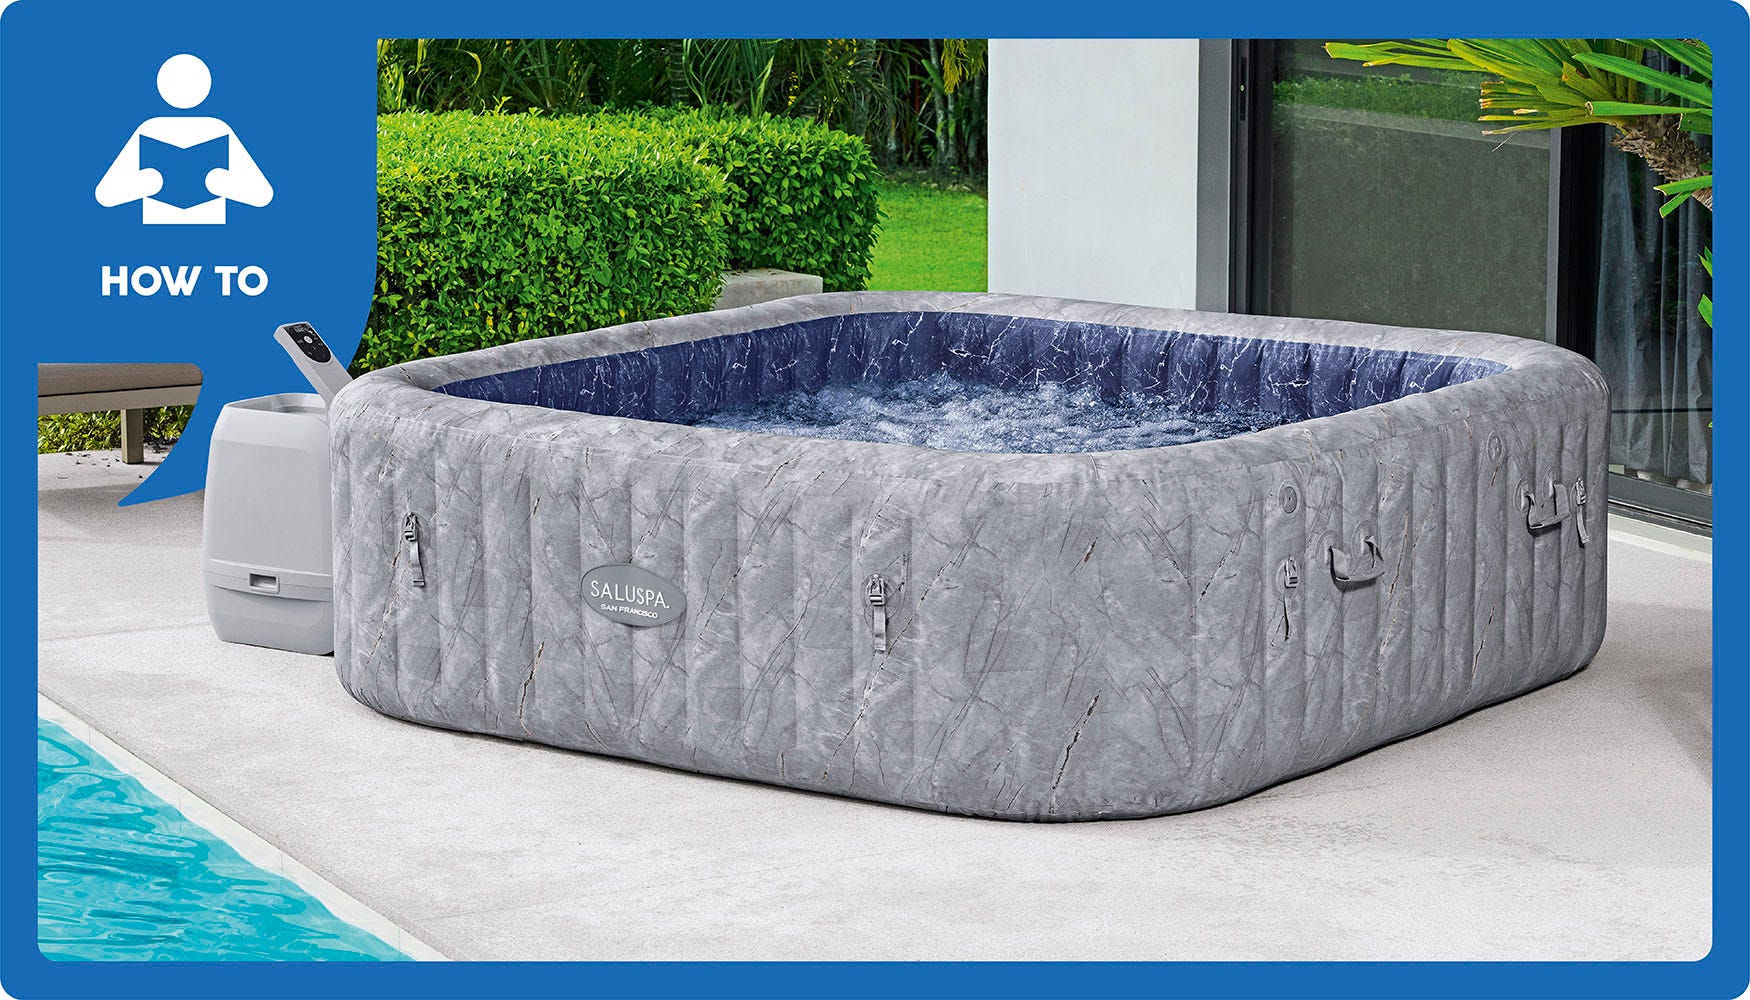
If you’re reading this, you’ve most likely recently purchased (or been gifted!) an inflatable hot tub and want to ensure you follow all the necessary steps to set it up securely (and accurately).
The great news is – it's simple! Just follow these five quick and easy inflatable hot tub setup steps so you can start relaxing.
1. Read the Owner’s Manual
Once you’ve unboxed your SaluSpa® inflatable hot tub, take a moment to read through the manual to get familiar with how to set up inflatable hot tubs. The manual contains details on important safety instructions, pre-setup, maintenance, disassembly and storage information, troubleshooting tips, error codes and more.
Before you start setting up your inflatable hot tub, read through the pre-setup checklist in the manual to confirm you’re choosing the best location. This is necessary to ensure you don’t void your warranty.
You’ll want to find a flat, smooth, supportive surface (grass or concrete) that’s away from your house with adequate drainage. Make sure the hot tub isn’t set up on a deck or a balcony that can’t support the weight of the hot tub once it’s filled with water, or on a spot on the ground that gets muddy when it rains.
Next, you’ll find the included parts and installation instructions on the top panel of the box. Make sure all the parts are inside your box. (It’s very unlikely a part is missing, but you’ll want to ensure they’re all accounted for before you begin setup.)
2. Inflate Your Hot Tub
Once you’ve found a good location and confirmed you have all the parts, unroll and spread out the hot tub. (If the temps outside are below 42.8°F, you’ll need to complete the initial setup of your hot tub indoors. Get more details on winterizing your inflatable hot tub.)
Begin by hooking up one end of the inflation hose to the pump and the other end to the hot tub. After you press the “ON” button on the hose attachment, press the “Massage System” button to begin inflating your hot tub. (You may need to hold the button down for at least two seconds for inflation to begin.)
Now, watch the magic unfold as your hot tub inflates in just minutes! Press down on the hot tub to verify it has enough air and is firm to the touch. If it’s fully inflated, most (or all) of the wrinkles should go away with firm pressure. Once you’ve done that, you can remove the hose (and put the cap on the spout) and hit the “Massage System” button again to stop inflation.

3. Inflate Your Cover
Since you’re still in inflation mode, next you’re going to inflate the hot tub cover. Begin by placing the inflatable insert inside the cover. Once inside, hook the hose to the spout on the insert (the other end of the hose should still be attached to the pump). Then, just like you did with the hot tub, press the “Massage System” button to begin inflating the cover. Once inflated, take out the hose, close the spout and hit the “Massage System” button again to stop inflation.

4. Connect the Pump
Now that your hot tub and cover are inflated, you’re ready to connect the pump to the hot tub. After you’ve confirmed the pump hoses are attached to the correct spots, line up the pump with your hot tub and connect the three spouts by twisting them together. Next, remove the two caps on the inside of the hot tub and attach the ChemConnect® dispenser (an included accessory that evenly disperses the proper amount of chemicals to maintain clean, clear water).

5. Fill with Water
Lastly, now that your inflatable hot tub is set up, it’s time to fill it up! Using a garden hose (do NOT use salt water), start filling up your hot tub to the indicated level (there is a minimum/maximum line on the inside of the hot tub).

Once it’s full, it takes about 24 hours for the water to get to the set temperature.
Tip: Once you’re at the set temperature, the power-saving timer allows you to set when the pump turns on and how long it will run. Once the timer is complete, the heater will go into power-saving mode to conserve energy until you’re ready to use it again.
After 24 hours, if you’re not going to get in right away, secure the reinforced cover in place to lock in heat and keep out dirt and debris.
Tip: Now that your hot tub is set up, keep the water clean with an all-in-one chemical starter kit that has everything you need to care for your inflatable hot tub! With a hot tub chemical kit, keeping your hot tub water crystal-clear is easy when you follow these 3 simple steps!
Need additional tips on keeping your inflatable hot tub clean for years to come? Follow these basic and deep cleaning steps to give your hot tub a fresh start.
That’s it! Now you’re ready to go unwind in the comfort of your own backyard.
How-To Video: Want to watch a hot tub setup in action? This easy-to-follow YouTube video shows how to set up inflatable hot tubs with confidence and ease.
Still need help? Check out our FAQs for more tips!
Every article is researched and created by experienced copywriters, product and industry experts and outdoor enthusiasts who want to enrich your life with fun, adventure and happiness!
Follow Bestway USA on Facebook , Instagram and TikTok for more!

PRODUCT TITLE
PRODUCT TITLE
PRODUCT TITLE
PRODUCT TITLE


